Saturday, June 22, 2013

Folding Garden Bench

It's done!

We have finished the garden bench.

This is the finished garden bench we have made, modeled after my grandparents garden bench at least 50-60 years or more old.

We've added one more slat to the back and the seat with another support under the seat..
We changed the color of the carriage bolts and coated them to weatherproof them and match the finish!
Here it is:


Ready for an enjoyable rest!


A Straight on shot.


Partially Folded.


Folded and ready for storage or transport!

Hope you like it!

Let us know what you think.

We would really like to hear your thoughts!

Thank you for checking out the bench, have a great day!


Friday, June 7, 2013

Finishing a twined rug. (Part 3)

Hi, welcome back.

In this next video I show you how to Add a new color at the end of the row and how to do the last few rows.


In our next video we will show you how to remove the rug from the loom.

And how to add fringe.


Thank you for watching and if you have question feel free to ask. Please leave any comments below.

Wednesday, May 22, 2013

Twining Rug in More Detail. Video 2

Ta Da!

Here's the second Twining a rug Video.

We go into more detail on twining and show how to add a strip and, more importantly: How to turn a 'corner' at the end of a row!

(I hope you enjoy it. And if you have any questions or need more explanation, Please, feel free to ask and I
will answer with a video to show the answer!)


The next videos will show changing colors and when we get to the end how to finish and remove the rug!

Thank you for watching our video!


Friday, May 17, 2013

Hi,

thank you for being so patient with us. We've been so busy with other things we haven't been able to get together to add a new video on the sand and sea: blue, tan and white twined rag rug.

For now here are a few pictures on some of the progress I have made:


I'll be making the next video on continuing twining with the way you go around the ends to start another row and how to add new strips of material.

Enjoy your spring time and spend time with your loved ones! People make the world go 'round.
If you see someone without a smile, give them one of yours!

Again, thank you for visiting with me today. See you again soon!

Saturday, April 27, 2013

Hi,

 we're back this time with the actual twining process.

I had my cameraman, Hubba, take multiple pictures of this process but he suggested we try using his phone to do a video.
This would be far easier for everyone to visualise how the process works.
The last blog we warped the loom so now we start with the wefting!

Bear with me it's my first live demo and I"m nervous.
Just keep in mind the warp goes up and down (the orange, white and blue material you won't see when the rugs done)
The weft goes back and forth!


We'll show you progress pictures as the rug gets done!

Thank you for your time.
If you have any questions regarding twining please leave them in the comments or go to my Etsy shop and convo or to my Facebook page and ask. (Links are at the right and left at the top of this page
I would love to answer your questions!

Have a great spring day!


Tuesday, April 23, 2013

Hi, again! Welcome back!

My yard's full of purples, pinks and whites. 

The purple Phlox subulata and Lunaria with the periwinkle of the vinca minor are vivid together!

But enough garden talk you're here to see the warping of the loom!

Warping the loom.

Anyway, Lets see where we were last time. We were deciding what to use for the warp and getting ready to rip that material to do just that!


I decided to use the orange, blue and white sheet in the upper left corner. I found the other sheet to rip as well. 
I rip the warp in about 1-2" widths. I rip the pieces down the long side of the sheets to decrease the number of knots in the warp and ease of warping with longer lengths. 
This is the lengths of material ripped for warping . Now I need to make them into balls to store in a smaller basket.


Here are the balls of the ripped sheets ready to warp!


I then make a loop knot at the end of one of my lengths of material to hook on my first peg (in the upper right  hand corner of the loom)

Then work the material down to the first peg on the lower right side around that peg and up to the top peg. 

Back up to the next peg and continue wrapping up and down pegs until you reach the last peg.


 The last peg will be at the bottom left of the loom. Here you need another looped knot to hold the warp in place. This warp needs to be taunt. When you hit it gently with your open hand it should have a bounce to it!
This is the loom warped:


Now she's ready for Twining!  Next time we'll begin the hardest row, row number one! This is when we show you the twining process, that makes these rugs extra rugged.  
Once you get the hang of it twining has a nice relaxing rhythm. 
You'll see.

Until next time enjoy all the wonderful colors spring has to offer. I know I will. It's my favorite time of year!

Thanks again for joining us for warping the loom here at LibbyLuLa's Blog page.
See you next time!


.


Thursday, April 18, 2013

Hi,

I hope everyone is enjoying the beginnings of spring!
I love my yard full of daffodils!


I had the pleasure of the company of my Grand-Niece yesterday. 
She loved watching Uncle Nick cutting out some barns and silos on his big loud machines. We made several trips down the 'dungeon stairs' to watch him!
Then she watched Aunt Janet mixing paints and painting the barns and other things Uncle Nick had made. 
She really wanted to watch me make a rug. 
I had just finished a rug for myself out of all my little black dresses and skinny black slacks that no longer fit this no longer skinny old body! LOL


The point is, I didn't have a warp started on the loom and warping the loom was too tedious for her to watch. 
So I decided to do a blog of pictures of a twined rug from empty loom, warping and twining and removing the rug to adding the fringes.

Step one:
I find the materials I want to use to make the rug.
Then I tear strips of the material and make balls of these to use for the weft (the rows going back and forth across the rug) which is twined in front of and behind the warp.


I usually pick a material I don't want to see in the final rug as the warp because in a twined rug the warp is covered front and back. The warp is only seen at the ends of the rug in small loops. I usually fringe my rugs in a coordinating or matching color through these loops so very little of it is seen.
That done I begin my warping the loom.

That will be my next blog.
Tearing strips  and warping the loom.

Thank you for joining me.

If you want to see any pictures of anything we do OR have a suggestion for something we can do feel free to comment here or convo us on Etsy: 

Or 
contact me on Facebook!
My link is at the top of the page. I love trying to do new things!


'Til next time, have a great day!

Wednesday, April 10, 2013

Wow!

Yesterday items from our Etsy shop, LibbyLuLa, were in three different treasuries!


I just checked my shop stats: I have items in three treasuries today and it's not even 10am.!


What a wonderful thing to happen.

Let me explain a few things about Etsy. 
Etsy is a very socially oriented site. Once you open a shop there you are encouraged to join teams. 
These teams help you promote your shop. 
I went to the Teams site and researched teams that reflected my shop and requested to become a member. I am a member of 4 Etsy teams. 
Through communications with team members we learn different ways to get our shops seen by the public. 
Treasuries are one of these ways.

You pick items from other's shops to put in a group of items that fit a theme, which is the title for your treasury. You then let others know you've created a treasury and many people then come to those shops through visiting the treasury.
While viewing these items people can favorite the items and/or the shop. 

It's a great way to get  shops and items seen by potential customers. 
In turn those shops may feature your items in a treasury.

Here are the three Treasuries Items of ours were featured in yesterday:

Primitive Perfection.

Click on this link to see the whole treasury:

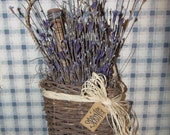
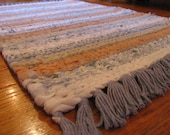
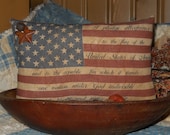
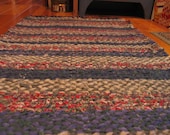
Primitive Spring Hanging BasketHand Twined Rag Rug in blues, tans and whites with Hand Tied Matching Fringe.  Free Shipping Coupon Code:   shpoffPrimitive American Flag tuck pillow
Little Hanna and Wooly E patternPrimitive Strawberry Bowl Filler & Basket, Summer, Spring, Soft Sculpture, Home Decor, Farmers Market, GardenPrimitive Chicken Pattern, PDF E-pattern,

Etsy's Seniors Rock Team

Click on this link to see the whole treasury:

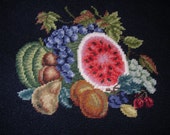
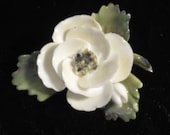
 Chic Cottage Washbowl and Pitcher - ca 1872Needlepoint Still Life Fruit Watermelon Autumn Leaves Harvest FREE SHIPPING to USAThis is a lovely floral brooch.  It is a vintage white rose pin with shaded green leaves.
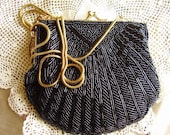
Hand Twined Country Colored Rag Rug With With Hand Tied Matching Fringe in Indigo  Free Shipping Code:  shpoffrustic wall coat rackVintage Beaded Bag

Folk Art Housing

Click on this link to see the whole treasury:

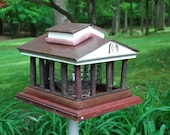
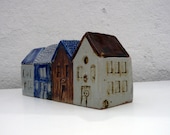
Vintage Folk Art Wooden Houses/VillageVintage Miniature Wood Housesthe Greek temple bird feeder
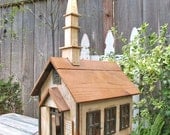
Fishermen's Cottages.Village Houses.Row Houses.OOAK.Wooden Primitive Colonial, Saltbox and Church, Hand made from pine. Free shipping coupon code:  shpoffVintage Wood Church House, OOAK,  Dollhouse, Birdhouse, Rustic, Hand Made, Folk Art Epsteam

Then the three treasuries from this morning:

Prim Treasures From AB4B Team

Click on this link to see the whole treasury:

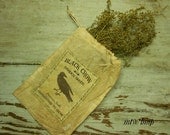
Primitive Doll Face Pillow made from Vintage Mattress Ticking TMAP AB4B TBCPrimsPrimitive Bird PinkeepExtreme Primitive Crow -OR- Sheep Ditty Bag Hanger with Sweet Annie grubby Early Look -OFG TEAM
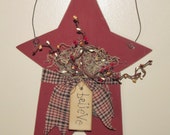
Primitive Raggedy Annie doll PATTERN,  original by DumplinragamuffinHand Twined Country Colored Rag Rug With With Hand Tied Matching Fringe in Indigo  Free Shipping Code:  shpoffWooden Star, Wall Decor


Fruits Of Our Labor  


Click on this link to see the whole treasury:

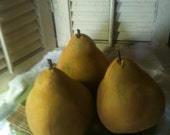
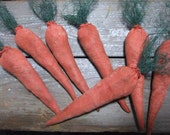
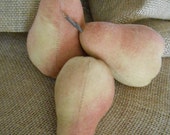
Large Farmhouse Primitive Pear Bowl Ornies Grunged Cinnamon Folk Art FAAP CPLG ECSPrimitive Carrot Bowl Fillers Garden Vegetables  Set of 3Unique Fruit & Vegetable Garden Harvesting Basket Handcrafted in NC - Medium Size
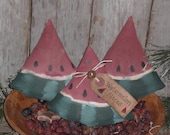
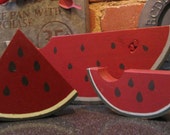
3 Primitive - Watermelon Wedges Slices - Summer Fun - Fruit - Slices - Bowl Fillers - Ornies - Ornaments - TucksCountry Watermelons Pieces, set of 3 Handpainted PinePrimitive Pears "Set of Three"


Fabulous Folk Art From The FAAP Team


Click on this link to see the whole treasury:

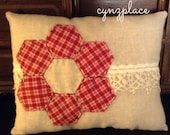
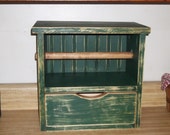
Red Hexigon Flower and Vintage Lace Pillow TuckPrimitive Rustic Hand Made Wooden Paper Towel Holder With StorageJ & P Coats Sewing Notions arrangement
Primitive Saltbox teapotHand Twined Country Colored Rag Rug With With Hand Tied Matching Fringe in Indigo  Free Shipping Code:  shpoffTommy Sewing Board

This is just a sampling of these Six Treasuries. 

Please go to them and check them out for the wonderful craftsmanship of these talented artisans!

You'll be glad you did!

Thank you, once again for visiting with us and have a great day!